The simplest way to get a slideshow project going is to take these
simple 3 steps BEFORE starting up Slides 2 Video:
Create a new
directory (folder).
Collect all the photos you intend to use in this folder by
moving, copying, or just linking them there.
Rename your photos by prefixing them with two-digit numbers
in the order you want them to appear in the video. For example, if you
want MomSmiling.jpg
to be your first slide, just rename it 01-MomSmiling.jpg.
And if you want P12083432.jpg
to be twelfth, just rename it 12-P12083432.jpg.
If you have over 100 slides in your video, you'll have to use a 3-digit
numbering system (01-MomSmiling.jpg
and 12-P12083432.jpg
and 142-TheRiver.png).
Of course the dash is optional. You may prefer to rename your photos
without it, as shown below.
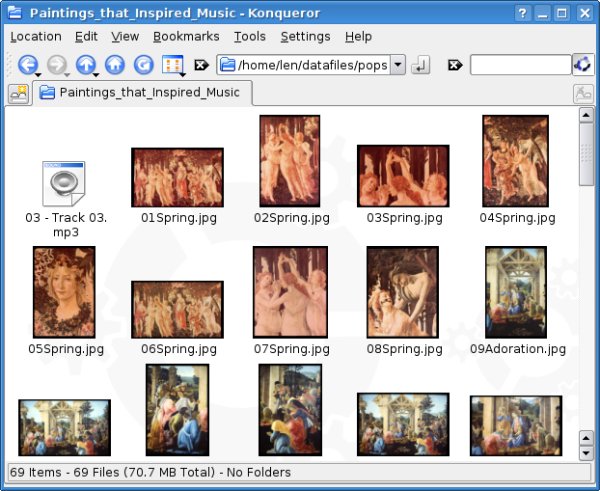
When you are finished, you should have something that looks a bit like
this:
Then when you start up Slides 2 Video, you can simply open this
directory and the slides will all be loaded in order!
Adding overlayed
text or making fancy title slides
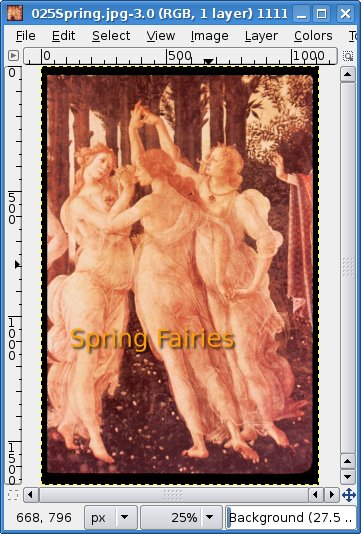
There is no facility for directly adding overlayed text or fancy title
slides. Download and install the GIMP (from http://www.gimp.org/ or
from your Linux distribution's package manager)! Use the GIMP to add as
fancy an overlay or title slide as you want. For example,
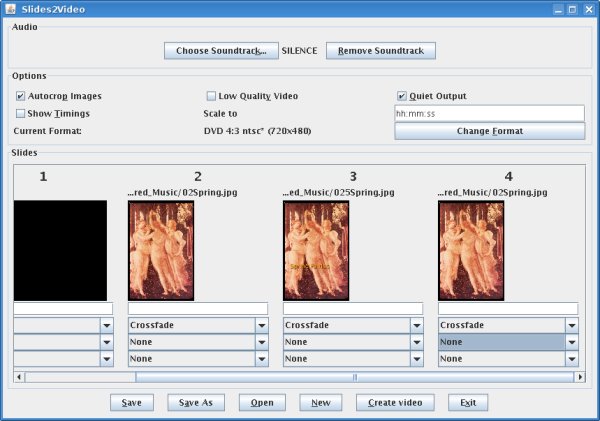
Then insert it into a
Slides 2 Video program. As shown here, the title will fade in and then
fade out of the picture. Look very closely at the second copy of the
picture of the fairies and you will see the title!
Previewing
Creating a video takes FAR TOO LONG to do it every time you make some
changes to a slideshow program. However, if you want to see how a
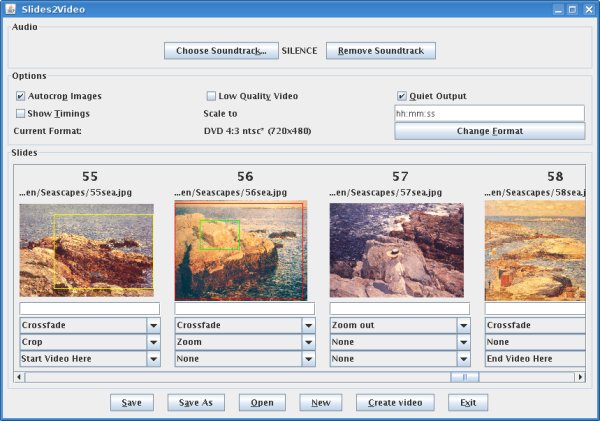
particular portion of your video is coming along, it's not so bad! Just
add the "Start Video Here" action to the first slide you want to see in
your preview. Then add the "End Video Here" action to the slide
following the last slide you want to appear in your preview. Then when
you click the Create Video button, only the part of the show from
"Start" to "End" will be created. Here, a video containing only slides
55-57 will be used when Create Video is clicked. So these slides can be
previewed without having to create the first 54 slides!
Including the audio
from an inserted video
When you have included a video in a slideshow project, the visual
component is automatically added, but the sound is not. If you want the
audio too, you need to extract it, and then add it to your soundtrack
using a sound editor like Audacity (which can be downloaded from
http://audacity.sourceforge.net/ or installed from a package in your
Linux distribution). Follow these steps:
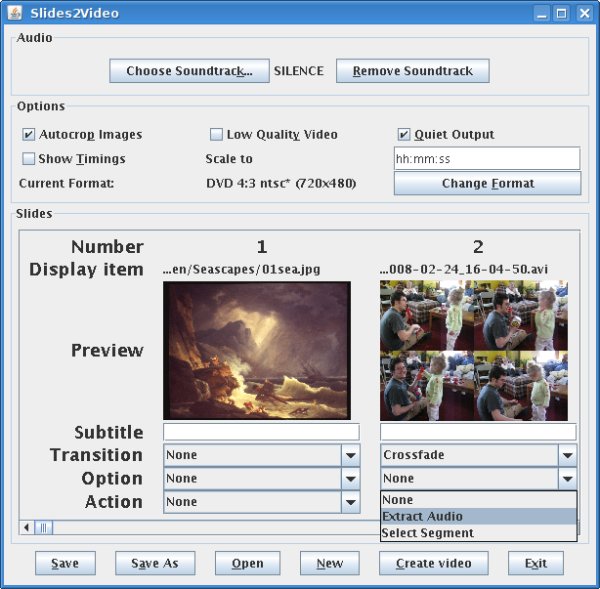
Insert your video into Slides 2 Video.
Extract the audio by selecting the Extract Audio option.
Use audacity to add the extracted audio to your soundtrack.
Be sure to add the soundtrack to your slideshow project.
Extracting audio from an inserted video in Slides 2 Video: